Tuesday, March 20, 2012

RAW chocolate brownies

Here is my first RAW “un-cooking” experience! Chocolate Brownies with Chocolate Ganache Frosting.
image
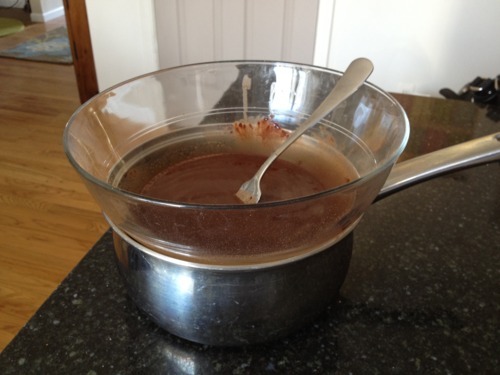
I first started with the ganache frosting since that had to slightly melt.
You combine 1/2 coconut oil, 1/2 cup raw cacao powder, and 2 table spoons of raw agave (my question is can agave actually be “raw”? Since i’ve seen it on multiple “raw” sites, i’m assuming, yes?). Place ingredients in a bowl & place over a pan of hot water, the warmth from the hot water will eventually melt the oil. Stir to combine.
image
Next, combine 1 cup raw walnuts, 1 cup raw pecans, and 1 cup dates in a food processor (i used my vita-mix which worked, but maybe processed it too much). Pulse a few times and then add in 1/2 cup raw cacao powder, pulse more until mixture is combined. {optional-add in some raw cacao nibs for added crunch}.
image
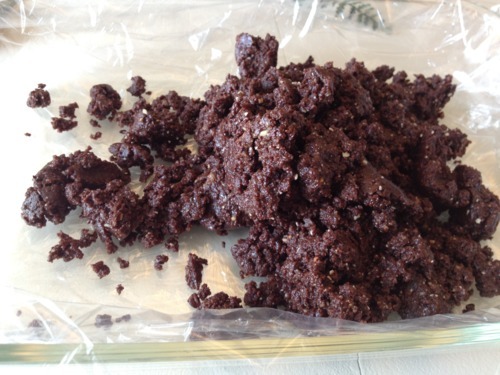
Press dough into a lined pan.
image
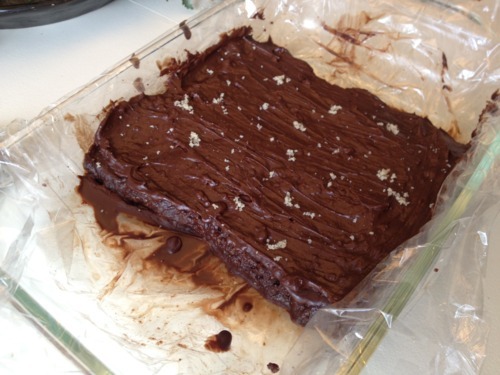
My pan was much larger than I need, but it worked fine. Just form into a square shape & chill in freezer or refrigerator for about 20 mins. Frost with ganache & top with crushed sea salt {optional}. return to refrigerator.
image
Serve chilled or at room temperature. Healthy alternative to baked brownies and sure to cure any sweet tooth!!

Saturday, February 25, 2012

NIRMALA Cooking Live on Martha Stewart

A few weeks ago I attended The Martha Stewart Show with my client Nirmala Nardine of NIRMALA'S KITCHEN. Nirmala, pictured with Martha, made a Moroccan Chicken Tagine that looked amazing & the smelled delicious!
I just now got around to making it myself and all I have to say is yummy!

Having my kitchen stocked with all of Nirmala's spices made this a quick & easy dinner. The only thing I did different was to omit the cranberries. You can get the recipe for Moroccan Chicken Tagine & watch the video on Martha's website.

Note to self....order more of Nirmala's Couscous because it goes with everything and it is so quick-n-easy to make!!

Thursday, January 19, 2012

Recycle Artwork into New Designs


Here's the perfect project to get you off your computer & enjoying some hands-on creating!

Ever wonder what to do with all of the art work your kids make at school? Are you running out of wall space to hang it all, or do you have boxes & bins over-flowing with drawings that you can't bare to part with? I do!

Here are just a few of my favorite watercolors done by my daughters.


I decided to take a Zen approach to my issue....cutting little pieces of each of the paintings to create one collage. This way I could view a little of each one, or at least feel that they were represented. The result was a piece of art not only created by my daughters, but myself, as I patiently leafed through the paintings, cutting and arranging to make a cohesive piece.


Next, I'd like to try a combo of their paintings, drawings, and writing....stay tuned!

Homemade Oreo Cookies


Homemade Oreos from SmittenKitchen.com, Adapted from Retro Desserts, Wayne Brachman

Makes 25 to 30 sandwich cookies

For the chocolate wafers:
1 1/4 cups all-purpose flour
1/2 cup unsweetened Dutch process cocoa {i used Equal Exchange Organic Baking Coca}
1 teaspoon baking soda
1/4 teaspoon baking powder
1/4 teaspoon salt
1 cup sugar
1/2 cup plus 2 tablespoons (1 1/4 sticks) room-temperature, unsalted butter
1 large egg

For the filling:
1/4 cup (1/2 stick) room-temperature, unsalted butter
1/4 cup vegetable shortening {i used Spectrum Organic Veg. Shorting}
2 cups sifted confectioners’ sugar
2 teaspoons vanilla extract
  1. Set two racks in the middle of the oven. Preheat to 375°F.
  2. In a food processor, or bowl of an electric mixer, thoroughly mix the flour, cocoa, baking soda and powder, salt, and sugar. While pulsing, or on low speed, add the butter, and then the egg. Continue processing or mixing until dough comes together in a mass.
  3. Take rounded teaspoons of batter and place on a parchment paper-lined baking sheet approximately two inches apart. With moistened hands, slightly flatten the dough. Bake for 9 minutes, rotating once for even baking. Set baking sheets on a rack to cool.
  4. To make the cream, place butter and shortening in a mixing bowl, and at low speed, gradually beat in the sugar and vanilla. Turn the mixer on high and beat for 2 to 3 minutes until filling is light and fluffy.
  5. To assemble the cookies, in a pastry bag with a 1/2 inch, round tip, pipe teaspoon-size blobs of cream into the center of one cookie. Place another cookie, equal in size to the first, on top of the cream. Lightly press, to work the filling evenly to the outsides of the cookie. Continue this process until all the cookies have been sandwiched with cream. Dunk generously in a large glass of milk.

the batter was thick, drier than your usual cookie dough


with a scooper I was able to get even sizing
 
you'll then want to hand-roll each cookie, this will create a smoother edge. I tried just flattening the "scooped dough" and the edges broke. while it tasted the same, it didn't look like a true Oreo. Also, be sure to flatten them enough, they don't spread as much as you might think, my first batch resembled more of a Whoopie-pie than an Oreo.

In conclusion, lots of time & effort goes into these cookies. You have to really love Oreo cookies for this recipe. I personally don't like Oreo's {sorry} but my girls wanted to give it a try. They loved them, and the flavor was spot-on {without all of the junk that's in conventional oreos}. This is a fun novelty treat for someone special.

Another....Six Layer Cake

Match your cake to your party!! Here is my daughter's 12th birthday Cake. I debated on serving the cake as shown below, without the outer-layer of frosting, but opted to frost it in the end. With the amount of frosting piled between each layer, there is plenty to balance the cake even without the outer layer. This way, you can showcase your colorful design!


Friday, September 9, 2011

Six Layer Cake


I once again tried the six layer cake (using the "rainbow Cake recipe") in a previous post. This time I went for a "watercolor" effect, using shades of one color. I think this would work perfect for a color-themed party or baby shower (in shades of pink or blue).

Thursday, September 1, 2011

GLUTEN FREE Chocolate Chip Scones

I have a new favorite scone recipe. BabyCakes raspberry scones were top of my list for a long time, but these Chocolate Chip scones are tough to beat!

My Gluten Free Chocolate Chip Scones have been tested by my "gluten-loving" family, and they have been given rave reviews!!

Here is my super-easy {and flexible} recipe 
{preheat oven to 350}

• 2 1/2 cups of almond flour
• 1/2 teaspoon salt
• 1/2 teaspoon baking soda

whisk together dry ingredients---

• 1/3 cup of coconut oil or grapeseed oil
   {i used 1/2 of each to equal 1/3 cup}
• 1/3 cup agave nectar
• 2 large eggs

whisk together wet ingredients---

• fold in 1/3 cup of old fashioned oats
• fold in 1 cup of chopped dark chocolate
{for this batch I used 1/2 cup of semi-sweet chocolate chips and 1/2 cup of chopped milk chocolate bar. Just happened to be what I had it the house}

use a 1/4 cup scooper to scoop on baking sheet.
I like mine cooked a little crispy, so I cook for 15mins.
depending on your oven, I'd say 12-17mins.


Yum! perfect for breakfast {good source of protein} or dessert. And, they freeze perfectly. I pull them out of the freezer, place in microwave for 20 seconds.
Enjoy!